I believe this is a fairly well-known recipe, and you can find it many places in cyberspace. However, I wanted to repost it because just in case you haven’t heard of it – you NEED this bread in your life.
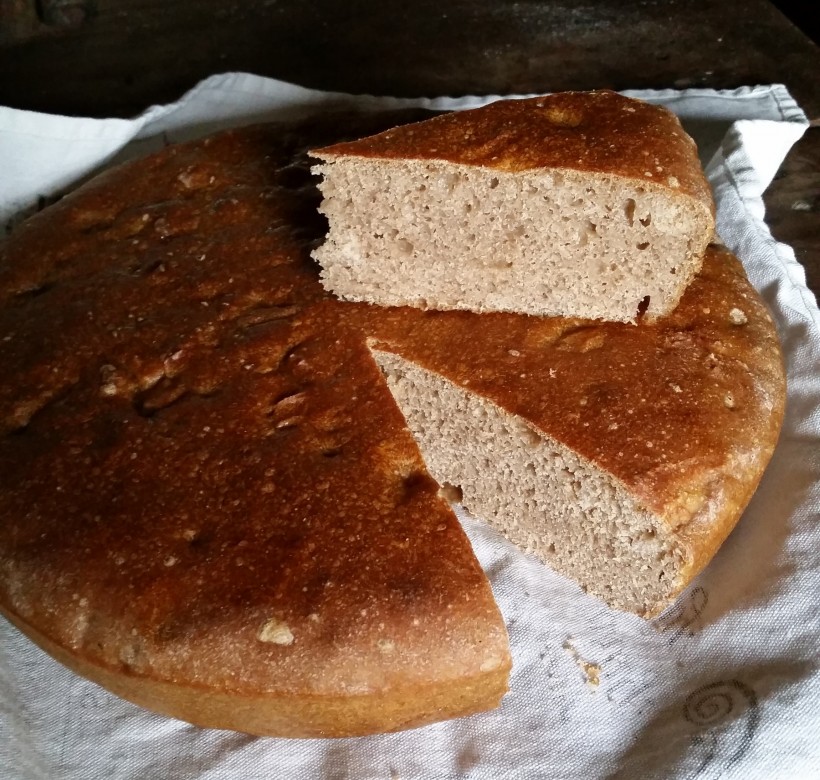
I make this bread because I don’t have time to make bread. It’s seriously so easy and takes almost no time. And I just love the texture – it’s chewy and soft, and not at all crumbly. You can even slice it thin for sandwiches and it stays together perfectly. Eventually I want to learn all about sourdough bread, because I have definitely not figured it out yet. But until then, I am so glad to have this recipe.
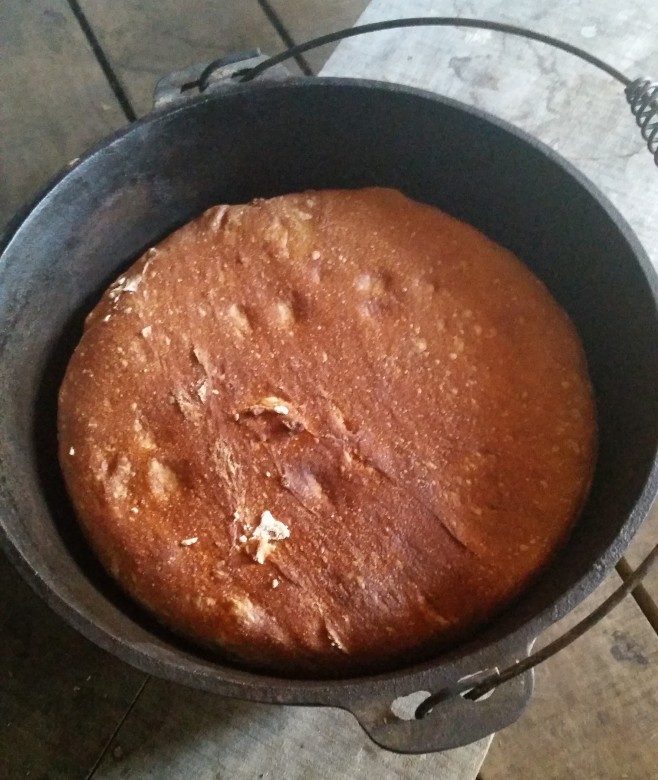
During one winter when I was growing up we had a non-working oven in the kitchen. Mom started making this bread on the back porch in a dutch oven placed in a washtub with live coals from the heating wood stove. So, I have fond memories of enjoying this delicious bread. It’s also great to accompany soup.
Do let me know if you try it!
No-Knead Dutch Oven Bread Recipe
1/4 tsp active dry yeast
1 1/2 cups warm water
3 cups all-purpose flour, plus more for dusting. You may use white, whole wheat or a combination of the two.
1 1/2 tsp salt
Cornmeal or wheat bran for dusting
Instructions:
1. In a large bowl, dissolve yeast in water. Add the flour and salt, stirring until blended. The dough will be shaggy and sticky. Cover bowl with plastic wrap. Let the dough rest at least 8 hours, preferably 12 to 18, at warm room temperature, about 70 degrees.
2. The dough is ready when its surface is dotted with bubbles. Lightly flour a work surface and place dough on it. Sprinkle it with a little more flour and fold it over on itself once or twice. Cover loosely with plastic wrap and let it rest for about 15 minutes.
3. Using just enough flour to keep the dough from sticking to the work surface or to your fingers, gently shape it into a ball. Generously coat a clean dish towel with flour, wheat bran or cornmeal. Put the seam side of the dough down on the towel and dust with more flour, bran or cornmeal. Cover with another towel and let rise for about 1 to 2 hours. When it’s ready, the dough will have doubled in size and will not readily spring back when poked with a finger.
4. At least 20 minutes before the dough is ready, heat oven to 475 degrees. Put a 6- to 8-quart heavy covered pot (cast iron, enamel, Pyrex or ceramic) in the oven as it heats. When the dough is ready, carefully remove the pot from the oven and lift off the lid. Slide your hand under the towel and turn the dough over into the pot, seam side up. The dough will lose its shape a bit in the process, but that’s OK. Give the pan a firm shake or two to help distribute the dough evenly, but don’t worry if it’s not perfect; it will straighten out as it bakes.
5. Cover and bake for 30 minutes. Remove the lid and bake another 15 to 20 minutes, until the loaf is beautifully browned. Remove the bread from the Dutch oven and let it cool on a rack for at least 1 hour before slicing.
Yield: One 1 1/2-pound loaf.
Adapted from The New York Times. Online recipe source here.
(Atlanta’s note – rising the bread in between towels was too messy for me, so I just do my second rising in the same bowl covered with a towel)
This recipe looks so easy and delicious, and I am definitely going to try it! Thank you so much for posting it.
-Alice Wright
http://www.thewrightfamilyfarm.blogspot.com
http://www.whatsoever-lovely.blogspot.com