Split Rail Fence

Earlier this spring, we got around to starting on our fence which will, when finished, run the perimeter of our little homestead. The fence is built of split cedar rails, made by splitting eastern red cedar logs that are around 8 inches in diameter into fourths lengthwise, and is modeled after those commonly used up into the early 20th century in America.
A steel splitting maul with a 6 pound head is used as a hammer, and a combination of wooden and steel wedges are driven into the logs to split them. More traditionally, a large wooden mallet would have been used to drive wooden wedges, called gluts, to do the splitting.

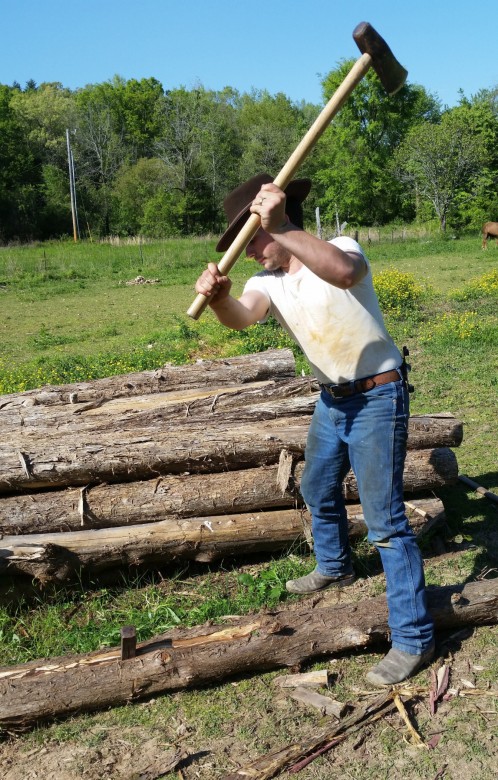
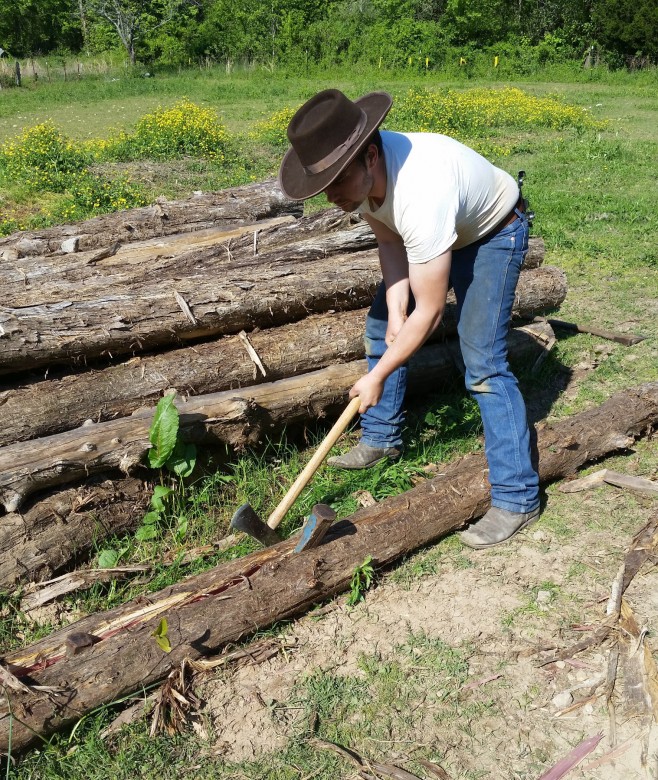
To start the split, the first wedge is driven into the end of the log.


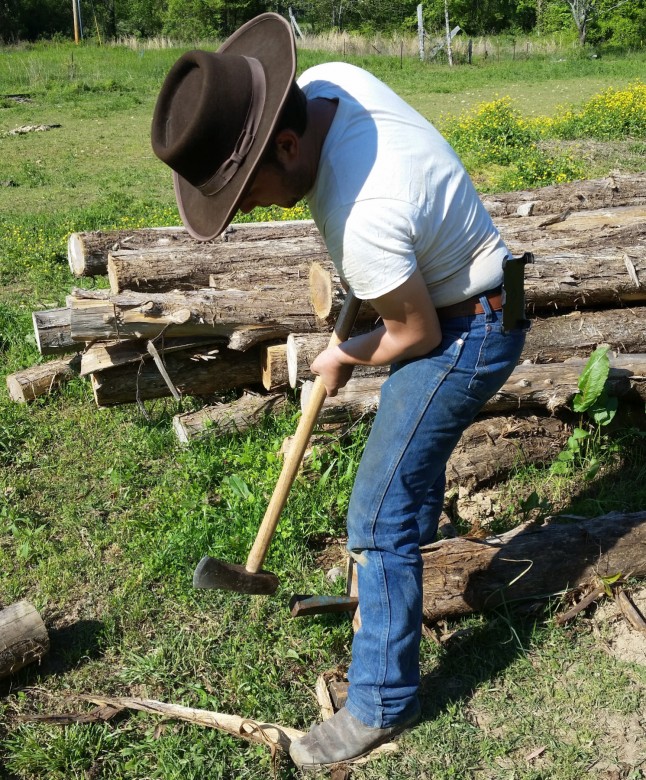
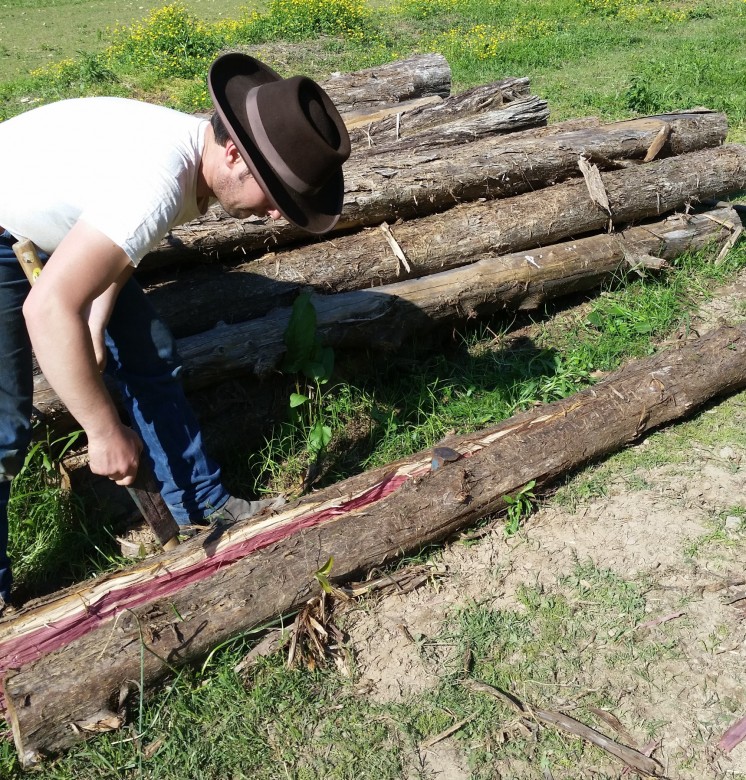
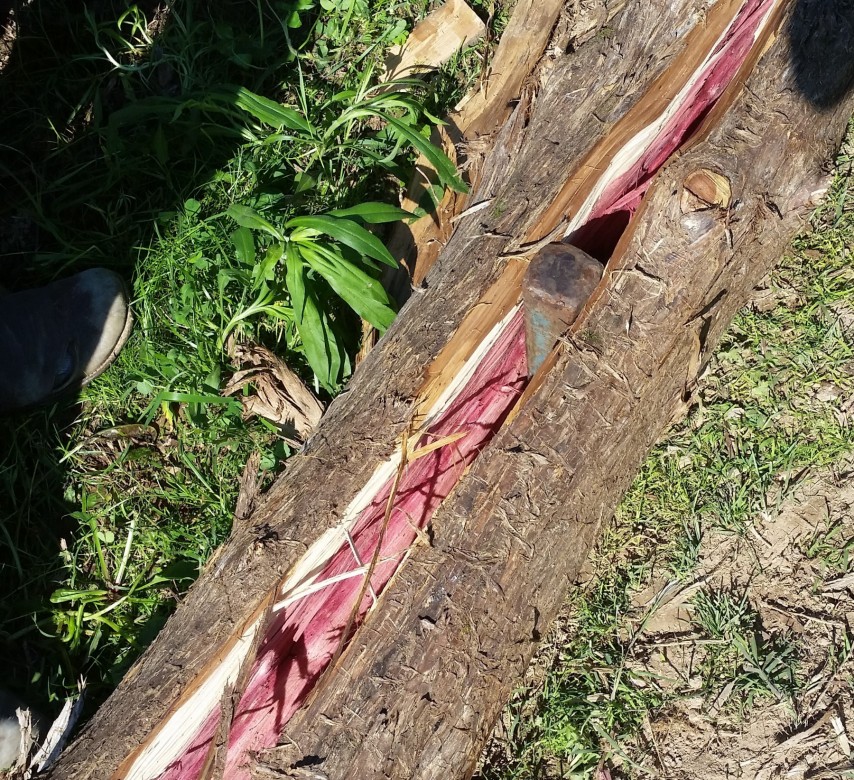
As the crack forms and widens, another wedge is inserted and driven in to widen the crack further.

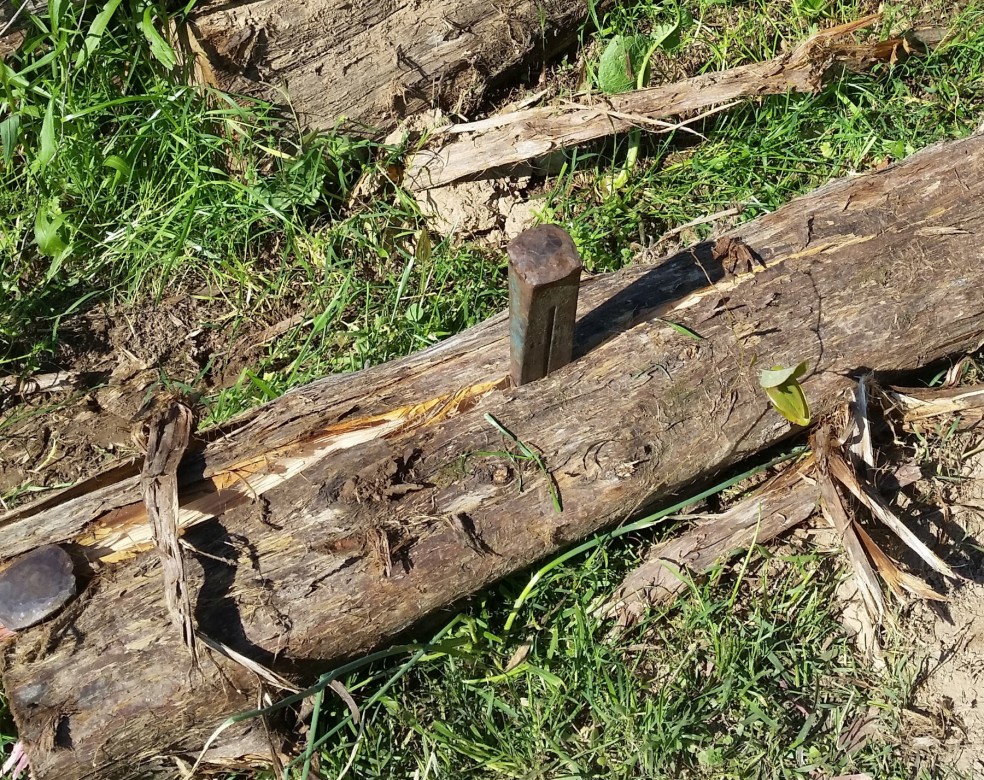
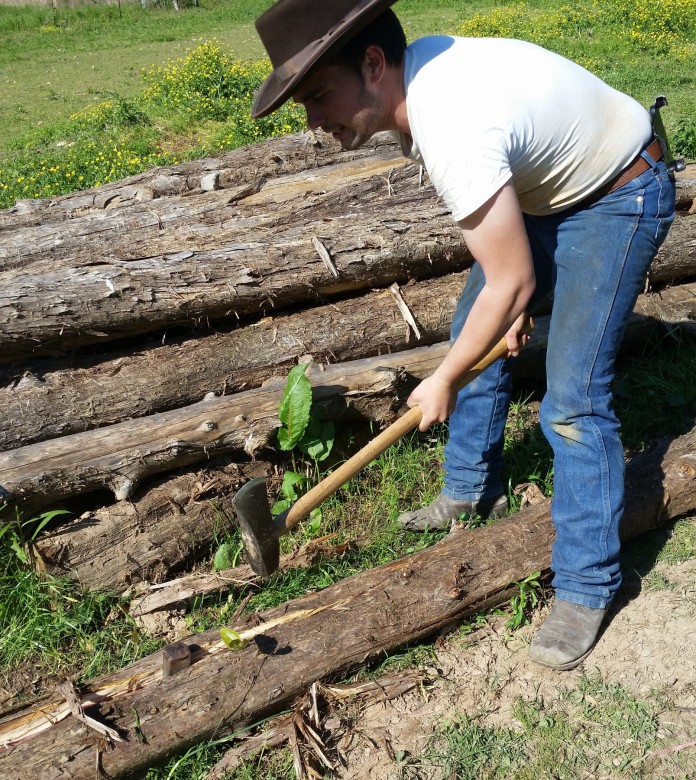
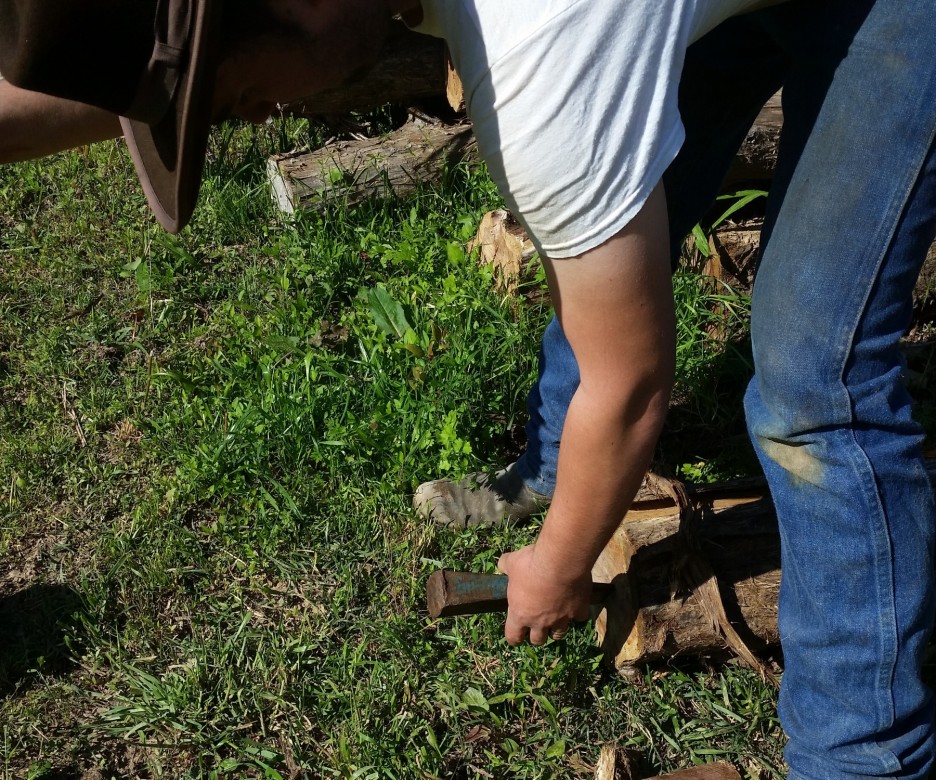
As the second wedge is driven in, and the crack grows, the first wedge loosens and is removed. It is now leap-frogged over the other wedge, and driven in again, further up the log.

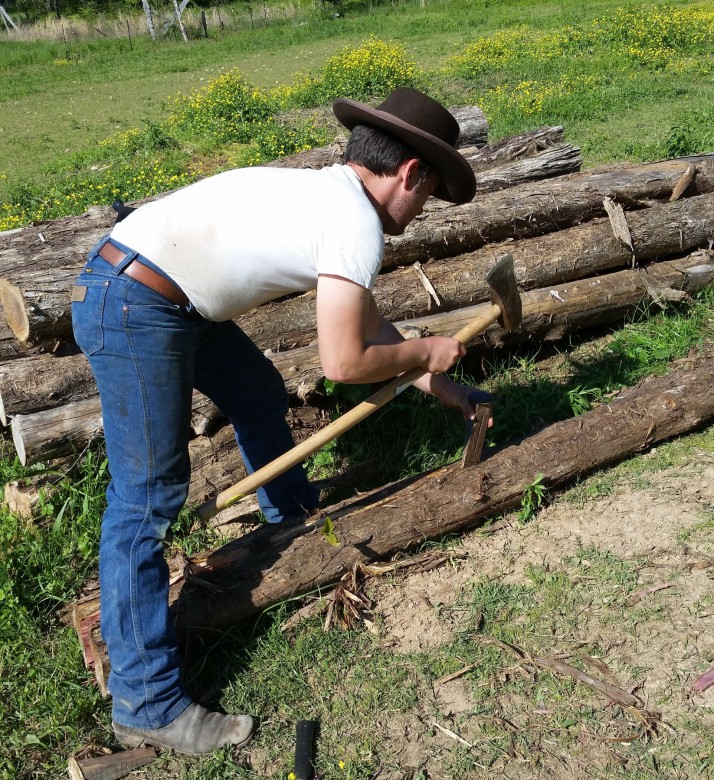
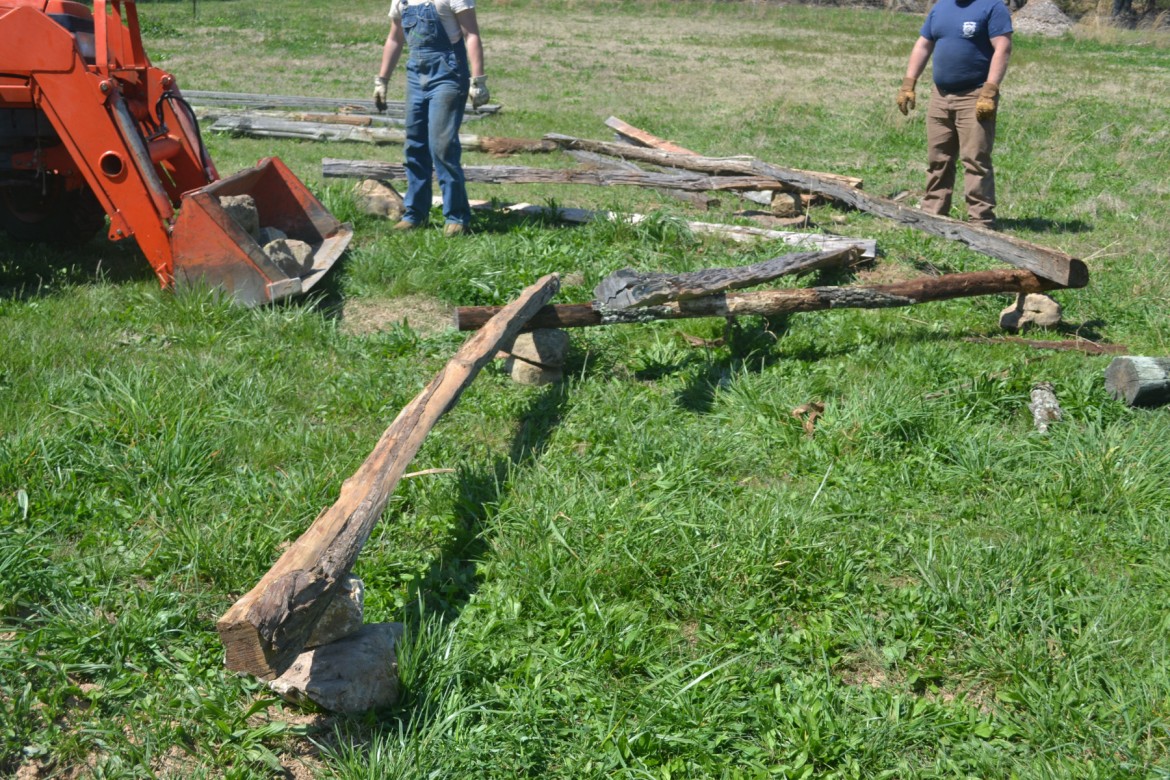
The split is continued to the end of the log, and then the resulting log halves are split into quarters. It is usually easier to split the log halves than it is the first split.

I consider this quite enjoyable work. As the wood splits it makes a very loud satisfying crackling sound. Split wood also lasts longer than wood cut by a sawmill, because the split follows the fibrous grain of the wood, while a saw cuts the wood with no regard to the direction of the grain, and leaves a sort of fuzzy surface which soaks up water.

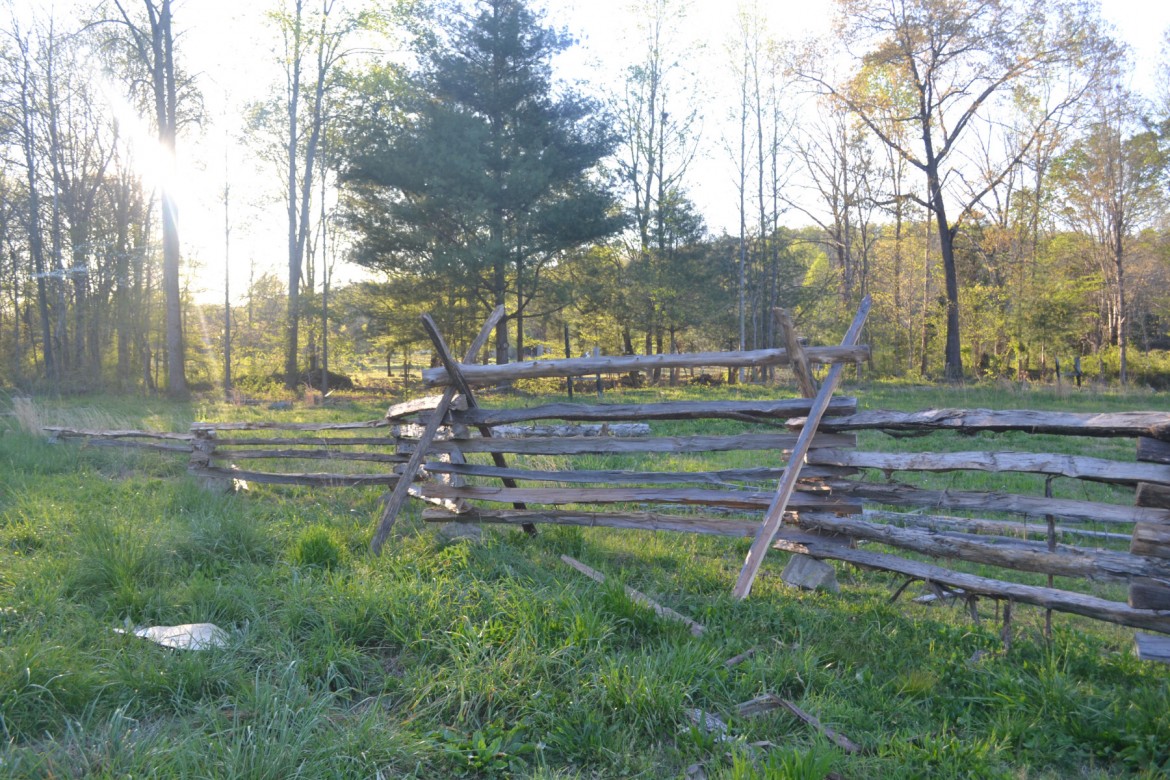
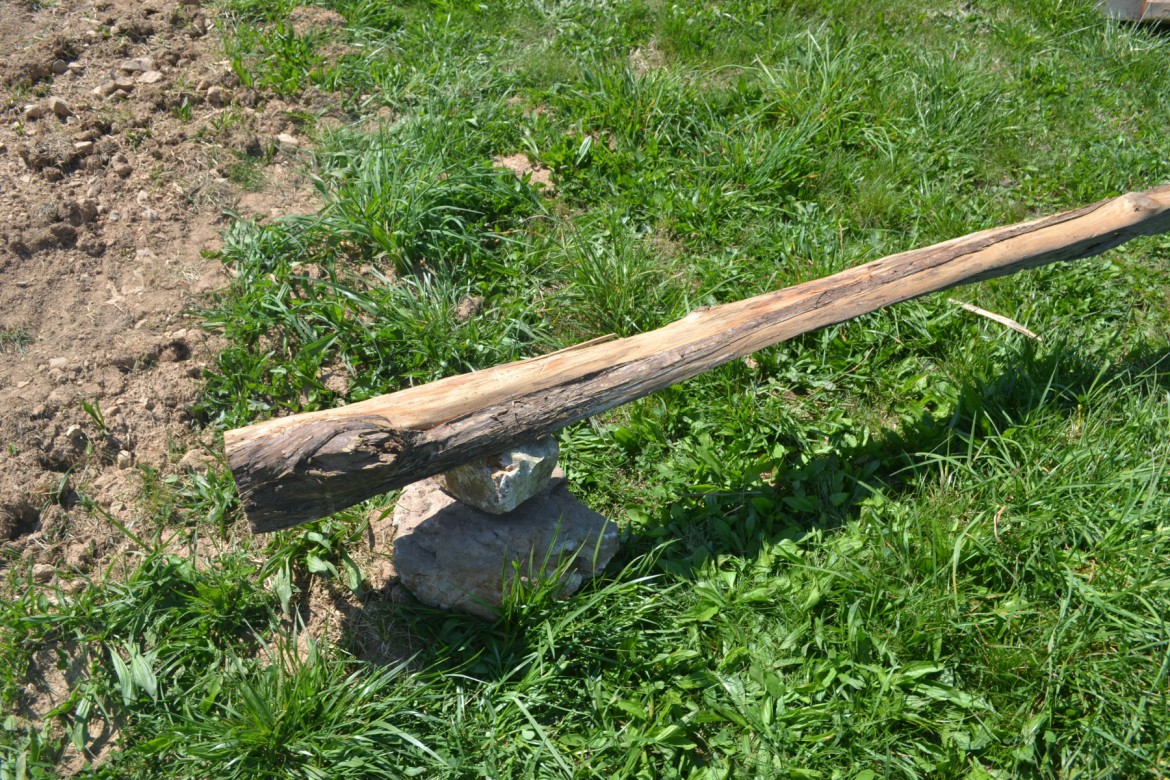
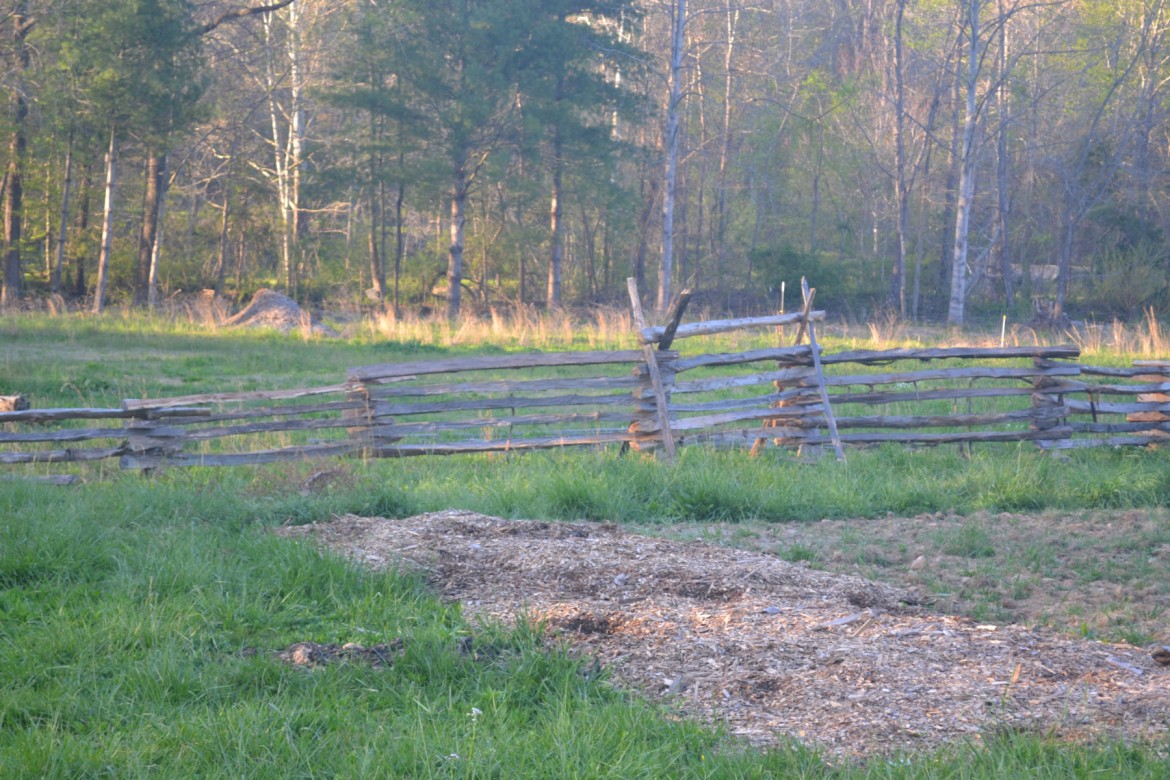
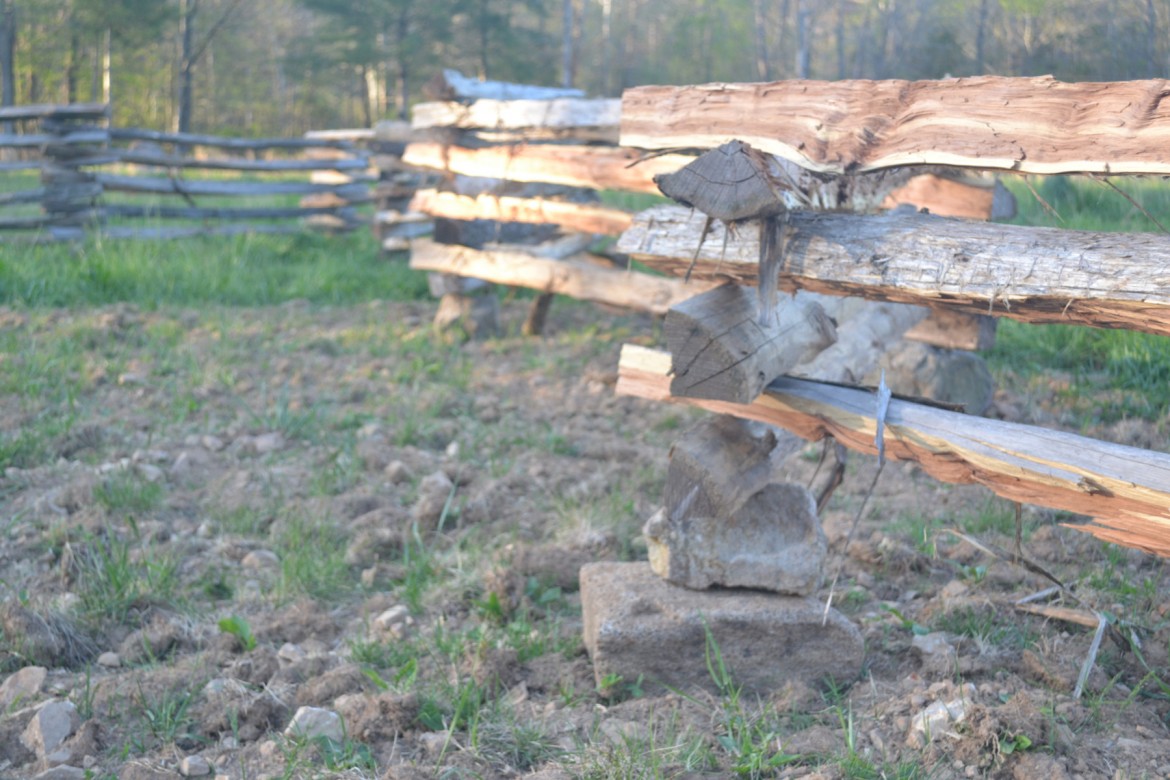
When ever I see a good building rock – one that is somewhat square – I gather it from the creek bed for future use. These rocks or stacks of rocks  8 to 12 inches high are placed in a zigzag pattern which straddles the line the fence is to follow, and the first rails are set in place. The rocks add some height, and will keep the wooden rails away from the damp ground, helping the already-rot-resistant cedar wood to last even longer.

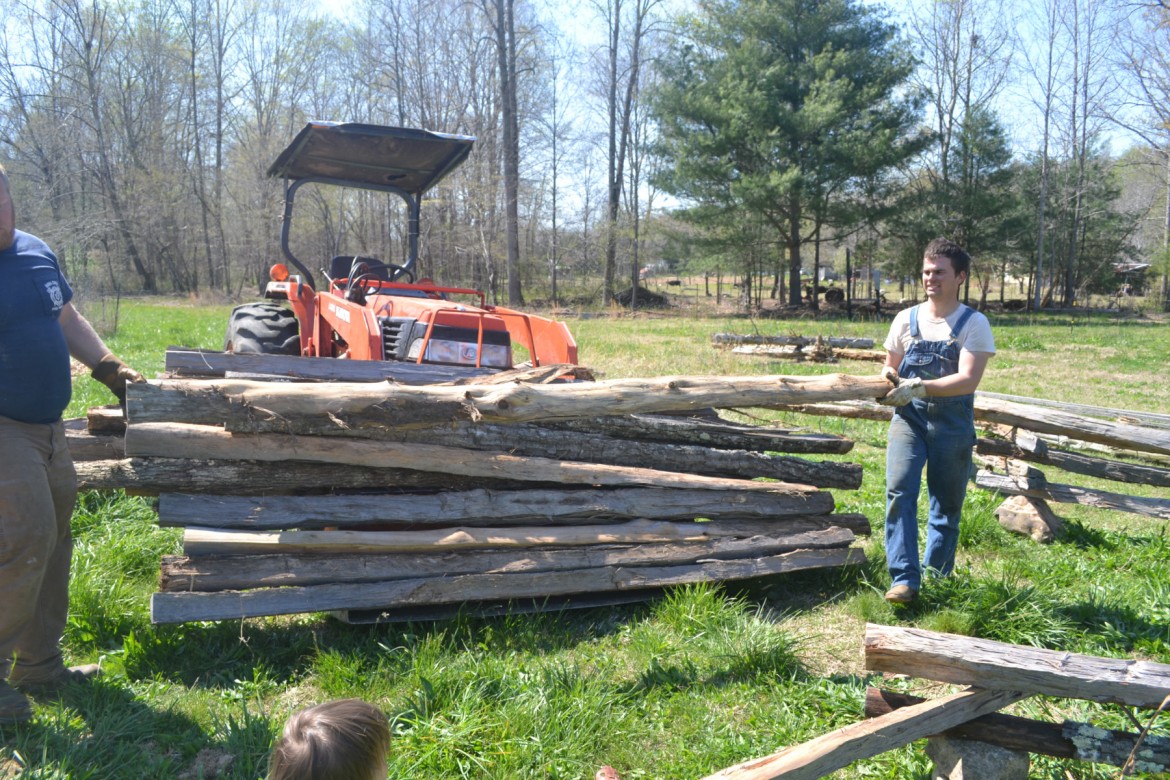
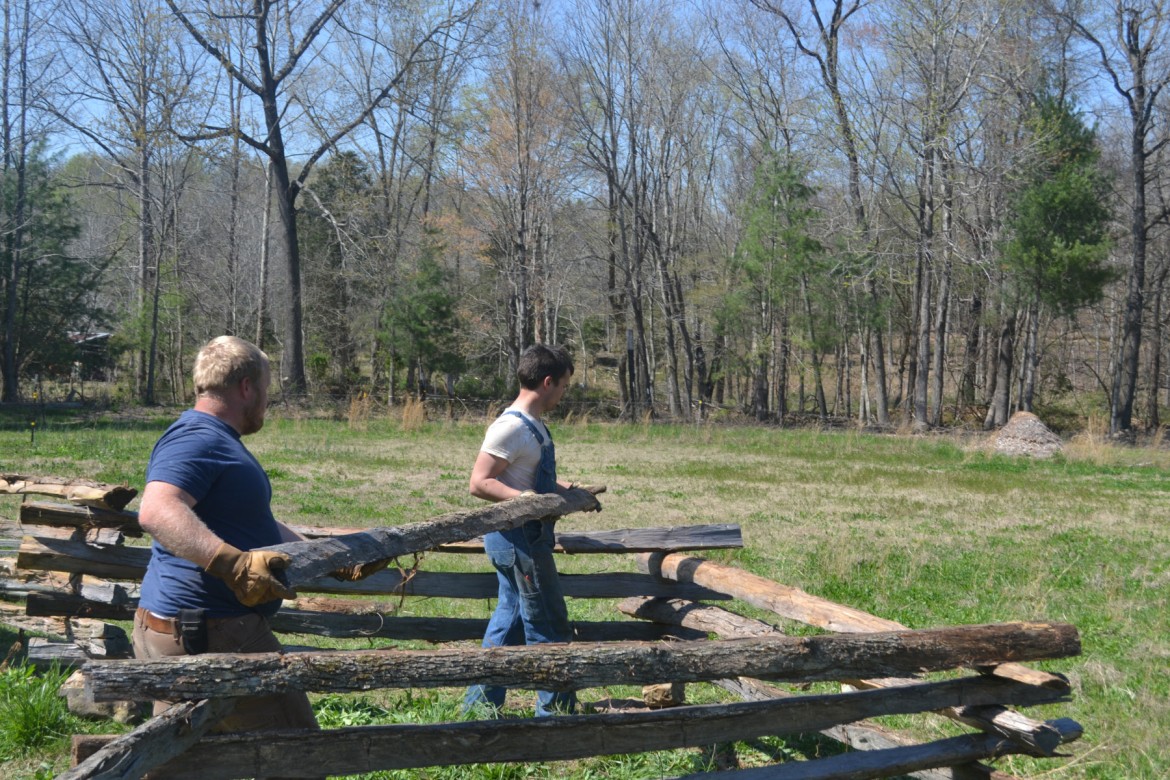
Got some great help from our dear friends, Jesse and Alice from over at The Wright Family Farm.

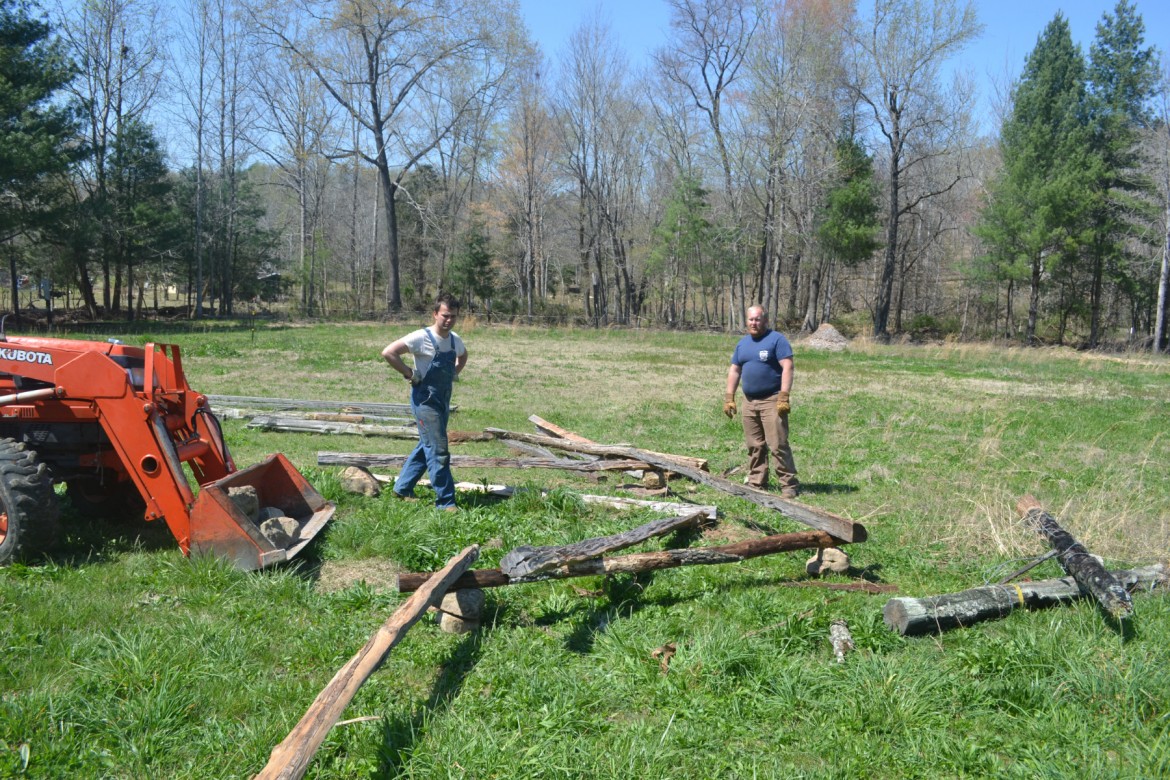
Marian and Alan love to watch anything that is being done outside. They’re joined here by little Gavin.

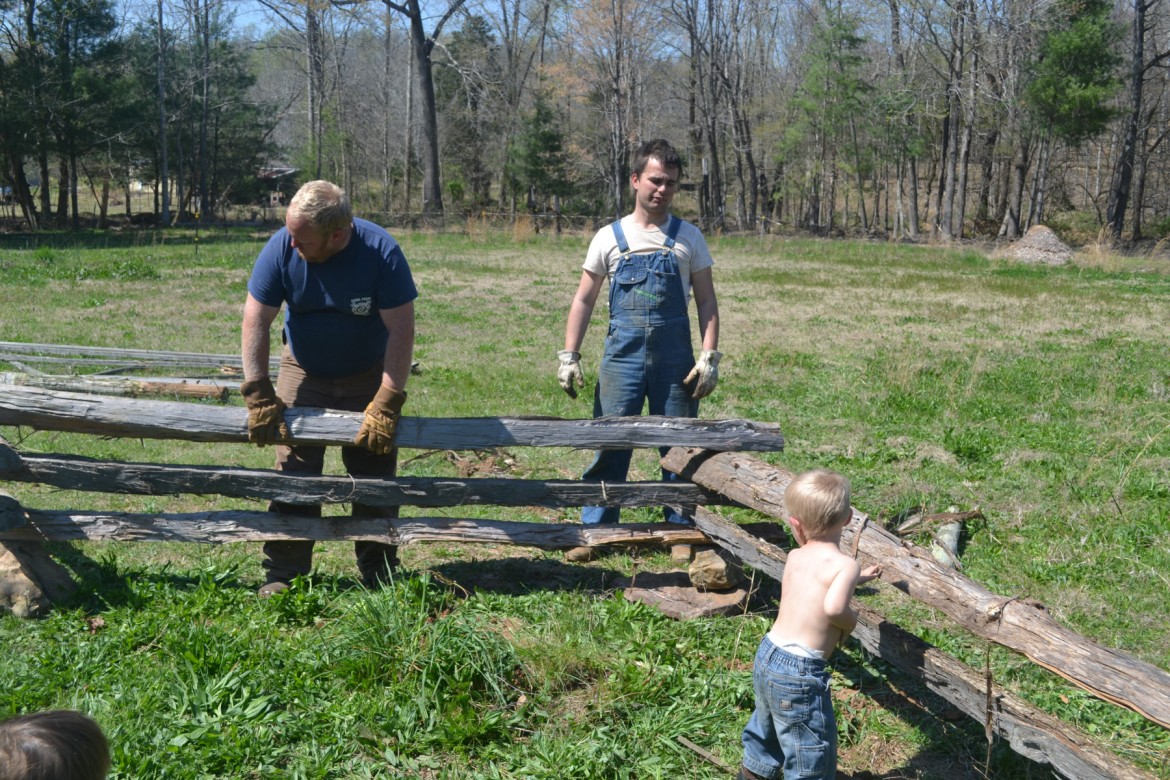
The finished fence will be stacked 5 rails high, with vertical braces and an added top rail, which add stability to the fence and bring it to about 6 feet in height.

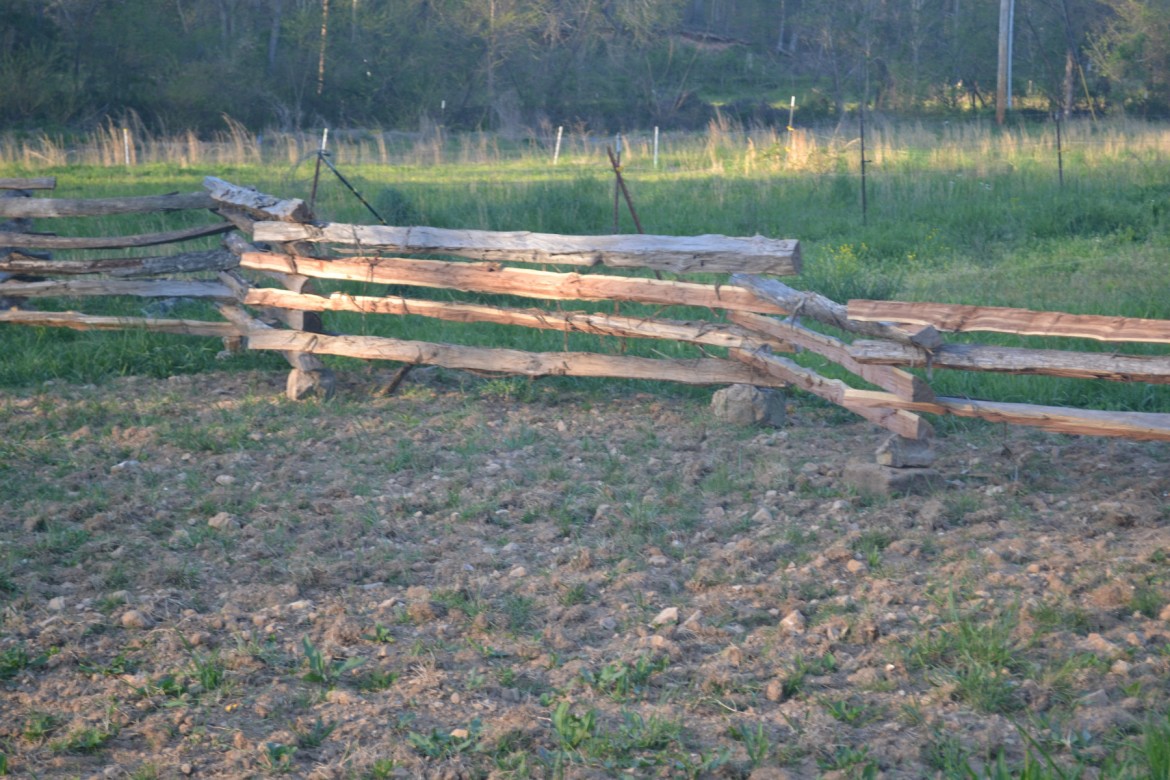
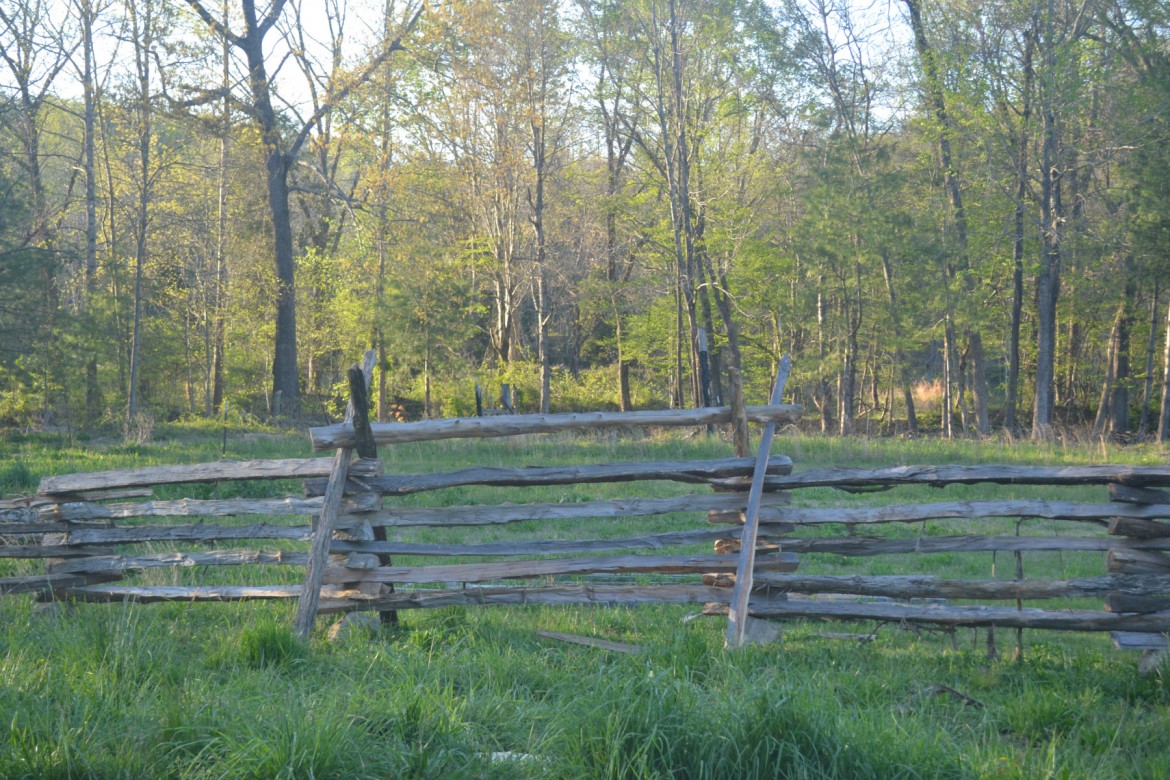
This type of fence is sturdier than you might think from simply being stacked – once the height is completed the weight of the wood is considerable, and the rails and sections of fence lock together well. We also like how it provides a significant visual barrier (as opposed to a hot-wire fence for instance) and we are hoping this will discourage any escape-minded animals we may have in the future, as well as acting as a deterrent to the occasionally wandering critters belonging to neighbors. Looking forward to trying it out with livestock. Until then, we love how picturesque the split-rail fence is and are anxious to add more sections!

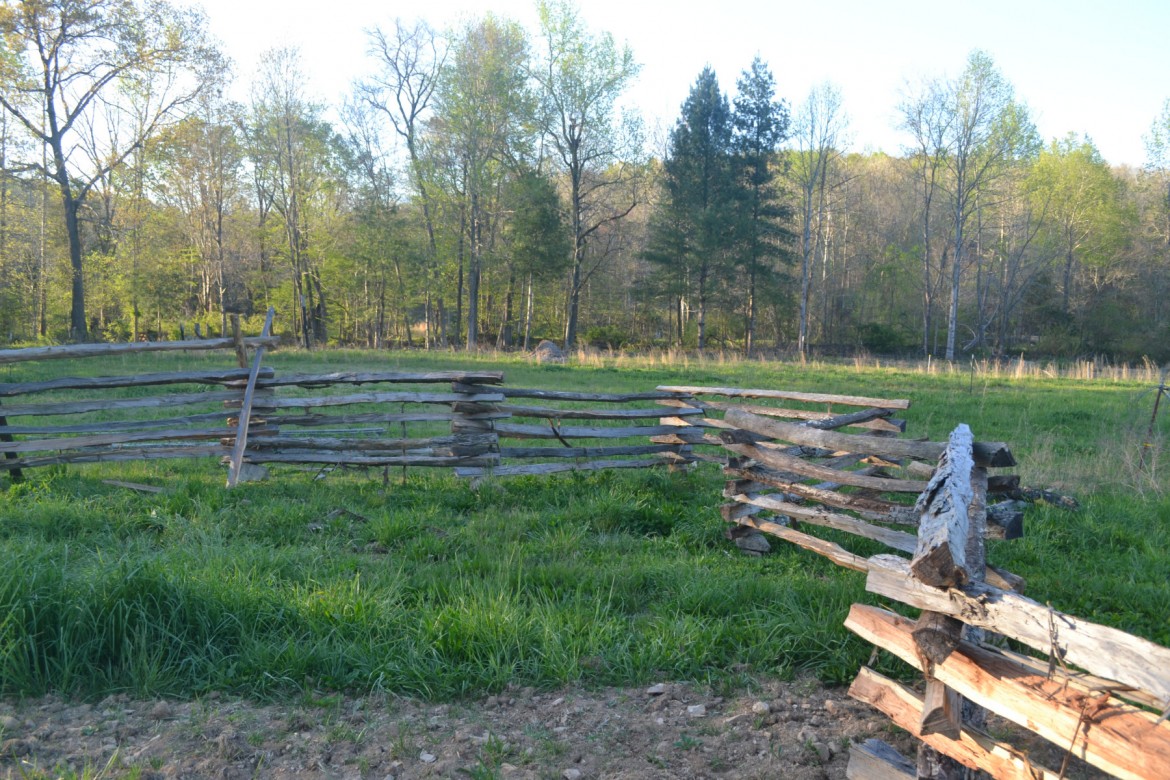
So far, only a little corner of the fence is (mostly) done. Lots more to build!

How to Construct an Off Grid Shower with a 5-gallon bucket

The 5-gallon bucket Shower

So, I did this project back in march, and this post should have gone up then… but, better late than never, right? :)

For awhile now, we’ve had our claw-foot tub in the bathroom, with the drain plumbed in. But having no running hot water yet (and running cold water in only one place in the house so far- the kitchen sink), we have not been able to take showers, only baths, and that’s not terribly easy. We have to heat water on the stovetop or in a big cast-iron kettle outside, and then haul it to the tub in pots or buckets. It takes a lot of hot water to get a decently-deep bath in our large tub, too.

We got the “bucket bath” down to an art, too. The advantage to the bucket bath is that it takes much less hot water than filling the tub (it’s also not a real bath- and therefore not as awesome :).

Bucket bath: set a 5-gallon bucket in the tub, and fill with water at the desired temperature. Then, using a small pot or other vessel as a scoop, pour the water over yourself, being careful not to run out of water before finishing washing. Sound awkward? It is. And that cast iron tub is normally cold when you sit in it. :P

Back in march, I made the time to put us a temporary shower rig together. Here’s what I came up with.

Here’s the hardware I used. At the top of the first picture are the pulleys I attached to the bucket and ceiling, for the lifting rope to be run through. I wound up not using the showerhead, as the weight of the water in the bucket did not create enough water pressure for the head to work. The water just sorta trickled out. I intended to try to make or locate a showerhead that would work with the low pressure, but never got it done, and we have pretty much gotten used to just a solid stream of water. Had I known this was going to happen, I would not have used the shiny tube either, but used cheaper PVC pipe instead.  I used a 5-gallon plastic bucket for the water reservoir.

Note the “o” ring at right, used with simple threaded PVC fittings to attach the assembly to the bucket, and seal the joint. Works great, and the rig doesn’t leak a drop.

wpid-20150318_094416.jpg

Fittings, 1/2″ PVC. Left to right: female thread/female glue, pipe, double female glue ball valve, pipe, female glue/male thread, rubber “O”-ring, female thread/female glue. All is assembled except for the last fitting (next photo), and the male threaded end w/o-ring is inserted into a properly-sized hole drilled in the bucket, near the bottom. The last fitting, the coupler with female threads in one end, is then screwed by hand onto the male threads from the inside of the bucket, clamping the assembly firmly to the bucket.

wpid-20150318_095253.jpgwpid-20150318_100131.jpg

Here, I removed one end of the wire bail on the bucket in order to slip the eye of the pulley directly onto the bucket.

wpid-20150318_100507.jpg

Here’s the bucket fitted with the shower.

wpid-20150318_102253.jpg

There are two pulleys. One is a single pulley, while the other is a double. The rope is tied to the bucket handle, goes up to the ceiling and through one side of the double pulley, back to the bucket and through the single pulley, and back through the other side of the ceiling pulley, with the free end of the rope hanging where it can be easily reached. The multiple pulley system is absolutely necessary in my opinion, as a full bucket of water would be very hard to lift with a single pulley. The more pulleys you have, the easier it is to lift the weight.

wpid-20150318_105631.jpgwpid-20150318_105729.jpg wpid-20150423_115355.jpg

Kinda fuzzy, but you can kinda see the rope and pulley setup here, along with the shelf that the bucket sits on after it is hauled up.

wpid-20150423_115431.jpgwpid-20150423_115409.jpgThe shower works pretty well, and certainly much better than the old “bucket bath”. A full bucket can give a really good shower for one person, and we can actually both get a pretty good shower only using 1/2 a bucket each. It doesn’t take a lot of hot water to make a warm enough bucket of water, either- 4 to 6 quarts of near-boiling water seems to be plenty, usually. So there you have it- one man’s 5-gallon-bucket shower. :)